

Ever get a card that just *pops*? Like, literally, a little paper surprise springs out when you open it? That’s the magic of pop-up cards, and it all comes down to some clever paper engineering. We’re going to explore the different ways these amazing little creations are put together, from the basic folds to more complicated designs. It’s all about understanding the mechanisms for pop up cards to make something truly special.
Key Takeaways
- Learn about basic folds like V and A shapes, and how parallel and angled folds work.
- Discover how to layer paper elements and combine different folding techniques for more complex designs.
- Understand how to create stands for 3D objects and arrange them so they don’t get tangled when the card opens.
- Get familiar with the tools and materials needed, and follow steps to build your pop-up creations.
- Find inspiration from other artists and learn how to adapt existing ideas or come up with your own unique pop-up concepts.
Mastering Basic Pop-Up Card Mechanisms

Getting started with pop-up cards might seem a bit tricky, but it really boils down to a few core folding techniques. Once you get the hang of these, you’ll see how they can be combined to make all sorts of cool things pop out of a flat card. It’s like a secret language of paper, and learning these basics is your first step to speaking it fluently.
Understanding V and A Folds
The V-fold and A-fold are probably the most straightforward mechanisms you’ll encounter. Think of them as the building blocks. A V-fold is essentially a single fold that makes an element pop up in a V shape when the card opens. An A-fold is similar, but it creates a more angular, A-shaped structure. These are great for simple figures or objects that need a bit of height. You can even layer them to create depth. It’s pretty neat how just a couple of folds can give paper such life.
Exploring Parallel and Angle Folds
Parallel folds are all about creating movement along a straight line. Imagine two parallel cuts and folds that allow an element to slide or move up and down. Angle folds, on the other hand, use angled cuts and folds to create a different kind of movement, often making elements swing or pivot. These are super useful for making things appear to move in a more dynamic way. You can see some really creative uses of these on sites that showcase paper art.
Layered Pop-Ups and Combinations
This is where things start to get really interesting. Layered pop-ups involve stacking different folded elements on top of each other, creating a sense of depth and dimension. You can combine the V-folds, A-folds, and parallel folds in all sorts of ways. For instance, you might have a background element that pops up using a parallel fold, with a smaller object in front using a V-fold. The key is to plan how each piece will move and interact with the others so they don’t get tangled. It’s a bit like choreographing a tiny paper dance. Learning how to create your own pop-up cards can be a really rewarding hobby.
Don’t be afraid to experiment. Sometimes the best designs come from happy accidents when you’re just playing around with paper and scissors. Try cutting different shapes and making folds in unexpected places. You might discover a new mechanism all on your own!
Advanced Techniques in Paper Engineering
Ready to move beyond the basic folds? This section dives into some more intricate ways to make your pop-up cards truly stand out. We’re talking about mechanisms that add movement and complexity, making your creations feel alive.
Incorporating Pivots and Tab Pulls
Pivots are fantastic for creating circular or swinging movements. Think of a bird flapping its wings or a character turning their head. You achieve this by carefully placing small holes and using brads or even just well-folded paper tabs to create a hinge. Tab pulls are even more direct – a simple pull of a tab can reveal a hidden message or make a whole scene change. It’s like a mini-magic trick right inside your card. Getting the placement just right is key here; too far off, and your movement won’t be smooth.
Designing with Flat Folds
Flat folds might sound simple, but they’re incredibly versatile for creating layered effects or elements that appear to emerge from the background without a lot of bulky mechanisms. The trick is in how you score and fold the paper so that the element lies relatively flat when the card is closed but springs into place when opened. This technique is great for making objects appear to float or stand independently. It’s a subtle but effective way to add depth.
Creating Complex Folding Sculptures
This is where things get really interesting, pushing the boundaries of what paper can do. Complex folding sculptures involve combining multiple mechanisms, layering different paper elements, and sometimes even using techniques like kirigami (which involves cutting as well as folding). The goal is to build intricate, multi-dimensional scenes that are still able to fold down into a flat card. It requires a good bit of planning and precision, but the results can be absolutely breathtaking. You’re essentially building a miniature, foldable world. Many artists use books as a guide for these advanced paper engineering techniques.
When you start combining different folds and mechanisms, you have to think about how everything will interact. Will one part snag on another when it pops up? Does the whole thing still close properly? It’s a puzzle, but a really fun one to solve.
Designing Engaging Pop-Up Elements
Crafting Stands for 3D Objects
When you want an element to stand up proudly from the card’s surface, you’ll need to create a stand. Think of these as little paper legs or supports. The simplest way to make one is by cutting a slit into the main card and another slit into the object you want to stand up, then sliding them together. For more stability, especially with heavier objects, you might want to create a small box-like structure or a folded tab that attaches to the base card. The key is to ensure the stand is strong enough to hold the object without collapsing. You can experiment with different shapes and sizes of stands to see what works best for your design. Sometimes, a simple folded piece of cardstock, glued securely, does the trick.
Arranging Elements for Visual Appeal
How you place your pop-up elements makes a big difference. Consider the layering. Elements that are closer to the front should generally be smaller or placed lower down, while background elements can be larger or positioned higher. Think about creating depth. You can achieve this by having some elements attached to the base card and others attached to moving parts that come forward. It’s also good to think about the overall composition. What do you want the viewer to see first? What story does the card tell when it opens?
- Foreground: Place your main subject here, often attached to the first moving part.
- Midground: Add supporting elements that give context and depth.
- Background: Use these for scenery or elements that are far away.
Avoiding Entanglement of Moving Parts
This is a big one. If your pop-up has multiple moving parts, you have to be careful they don’t snag on each other when the card opens or closes. This often happens when elements are too wide for their stands or when they are placed too close together. Before you glue everything down permanently, test the mechanism repeatedly. Gently open and close the card to see if anything catches. Sometimes, just shifting an element a millimeter or two can solve the problem. You might need to trim a part of an element or adjust the angle of a stand. It’s a bit like solving a puzzle, really. If you’re making a card with a lot of moving pieces, it’s a good idea to look at how other people have solved similar problems. You can find some great inspiration and ideas on websites dedicated to paper crafts, like BestPopupBooks.
When designing, always think about the path each element will take as the card opens. Imagine a little car driving along that path. Does it hit any roadblocks? Those roadblocks are the parts that will get tangled.
The Art of Pop-Up Card Construction
Building a pop-up card from scratch can seem a bit daunting, but honestly, it’s mostly about having the right tools and knowing a few tricks. It’s not as complicated as it looks, and once you get the hang of it, you’ll be making these amazing paper creations in no time.
Essential Tools and Materials
To get started, you don’t need a whole workshop. Just a few key items will do the trick. Think of it like baking – you need flour, eggs, and sugar, right? For pop-up cards, it’s similar.
- Cardstock: This is your main building material. It needs to be sturdy enough to hold its shape but flexible enough to fold. Standard printer paper just won’t cut it.
- Cutting Tools: A sharp craft knife and a cutting mat are pretty important for precise cuts. Scissors work too, but for those really fine details, a knife is better. You’ll want to get your cuts just right, especially for the moving parts.
- Adhesives: Good quality glue or double-sided tape is a must. You want things to stick well without making the paper too wet or wrinkly.
- Scoring Tool: This helps you make clean folds. You can use a bone folder, the back of a butter knife, or even an empty ballpoint pen.
- Ruler: For measuring and making sure your folds and cuts are straight. A metal ruler is best if you’re using a craft knife.
Step-by-Step Assembly Guidance
Putting it all together is where the magic happens. It’s a process, but breaking it down makes it manageable. Here’s a general idea of how it goes:
- Prepare Your Base: Start with your main card. Usually, you’ll fold a piece of cardstock in half. For a standard card, cutting the outer paper to 8.5 x 6 inches and the inner paper to 8 x 5.5 inches is a good starting point [7c8e].
- Create the Mechanism: This is the core of the pop-up. You’ll cut and fold specific shapes into the inner card to make elements spring up when opened.
- Attach the Elements: Glue your pop-up pieces onto the mechanism you just created.
- Decorate: Add any extra details, drawings, or cutouts to bring your scene to life.
- Test and Refine: Open and close the card gently to make sure everything moves as it should. Sometimes you need to adjust a fold or trim a piece slightly.
Building a pop-up card is a bit like solving a puzzle. You figure out how the pieces fit and move together to create a surprise. Don’t be afraid to experiment; that’s how you learn what works best.
Troubleshooting Common Issues
Even with the best intentions, things can go a little sideways. Don’t get discouraged if your first few attempts aren’t perfect. Here are some common hiccups and how to fix them:
- Elements Not Popping Up: Check your folds. Are they crisp enough? Sometimes the mechanism needs a little more pressure on the fold lines. Make sure the pieces aren’t glued down too tightly to the base card.
- Parts Getting Stuck: This usually happens when elements are too wide or too close together. Ensure there’s enough clearance for everything to move freely. If an object is wider than its stand, it might catch on the sides.
- Creased or Torn Paper: This often comes from folding too forcefully or using dull cutting tools. Be gentle with your paper, especially thinner pieces, and keep your blades sharp.
- Glue Smudges: Use a fine-tip glue bottle or a glue stick for cleaner application. If you get a smudge, try to wipe it away carefully with a damp cloth or an eraser while the glue is still wet.
Inspiration from Pop-Up Masters
Sometimes, looking at what the pros do is the best way to get your own ideas flowing. There are some really talented people out there who make pop-up cards look like pure magic. You can find tons of inspiration by checking out their work. It’s not just about copying, though; it’s about seeing how they solve problems and create those amazing moving parts.
Studying Designs by Leading Artists
When you look at the work of artists like Robert Sabuda or David A. Carter, you see how they use simple folds to create really complex scenes. They often start with basic mechanisms, like the V-fold or parallel folds, and then build on them. It’s like they’re telling a story with paper. You can find their books and websites, and just spend time really looking at how things are put together. It’s amazing what you can learn from just observing.
Adapting Existing Templates
If you’re just starting out, using templates can be a lifesaver. Many artists share their designs, and you can find them online or in books. Don’t feel like you have to stick to them exactly, though. Think of them as a starting point. Maybe you like the way a certain mechanism works, but you want to change the subject. Or perhaps you want to combine elements from a couple of different templates. That’s where the real creativity comes in. You can find some great supplies at places like Card Cut Ups.
Developing Unique Pop-Up Concepts
Once you’ve got a feel for the basics and have played around with templates, you can start coming up with your own ideas. Think about what you want your card to do. Do you want a whole scene to pop up? Or just one element? What kind of story do you want to tell? It’s helpful to sketch out your ideas first. Don’t worry if your first few attempts aren’t perfect. That’s totally normal. The more you practice, the better you’ll get at figuring out how to make your ideas work in 3D.
Don’t be afraid to experiment. Sometimes the most unexpected folds or combinations create the most interesting effects. It’s all part of the fun of paper engineering.
Bringing Scenes to Life with Paper

Making your pop-up cards feel like a real scene is all about how you arrange the paper elements and what you do with the background. It’s not just about the pop-up part; it’s about creating a little world that unfolds. You want to think about depth and how things interact when the card opens.
Creating Dynamic Backgrounds
Don’t just leave the background flat and boring. You can add layers to the background itself, or use different colored paper to make it pop. Sometimes, just scoring lines on the background can give it texture, like wood grain or water ripples. If you’re making a scene, think about how a real background would look – maybe a sky, some distant hills, or even a cityscape. You can achieve this with simple cuts and folds on separate pieces of paper that attach to the main card structure. It really makes a difference in making the whole card feel more complete.
Designing Interactive Elements
Beyond the main pop-up, you can add smaller moving parts. Think about little tabs you pull to make something else move, or elements that spin. These add an extra layer of surprise and fun. It’s like a little toy inside your card. You have to be careful, though, so these extra bits don’t get in the way of the main pop-up action. It’s a balancing act, really.
Adding Decorative Details
Once the main structure and pop-up elements are in place, it’s time for the finishing touches. This is where you can add small details that really bring the scene to life. Think about tiny flowers, little signs, or even just some shading to give objects more form. These details might seem small, but they add a lot of character. It’s like the difference between a sketch and a finished painting. You can find lots of inspiration for these little touches by looking at various pop-up experiments.
When you’re putting everything together, remember that the card needs to fold flat. So, even the most exciting pop-up elements have to tuck away neatly. It’s a bit like packing a suitcase – everything needs to fit without crushing.
Bringing Paper to Life
So, we’ve looked at how paper can do some pretty neat tricks, turning flat pages into little scenes that pop out at you. It’s amazing how simple folds and cuts can create such dynamic effects. Whether you’re just starting out with basic folds or aiming for more complex moving parts, there’s a whole world of paper engineering to explore. It’s a craft that really lets you play with dimension and surprise, and it’s pretty satisfying to see your own creations come to life. Hopefully, this gives you some ideas to try making your own pop-up cards or even a whole pop-up book.
Frequently Asked Questions
What are the easiest ways to make parts of a pop-up card stand up?
You can start with simple folds like the V-fold and A-fold. These are like basic building blocks that help parts of your card pop up when you open it. Many books and online guides show you how to make these easy folds.
Can I mix and match different pop-up folding techniques in one card?
Yes, you can combine different folding techniques! Many cool pop-up cards use a mix of simple folds, layered pieces, and sometimes even moving parts like tabs that you pull. This makes the card more interesting.
What basic tools and materials do I need to make pop-up cards?
To make things pop up, you usually need cardstock, scissors, and glue. Sometimes a ruler and a craft knife are helpful for precise cuts. Having a cutting mat is also a good idea to protect your table.
How do I stop the pop-up pieces from getting tangled?
It’s important to make sure the parts you attach to stands aren’t too wide. If they are, they might bump into each other or get stuck when the card opens or closes. Leave a little space between them.
Where can I find ideas and inspiration for my pop-up card designs?
You can get inspiration from looking at pop-up books and cards made by artists. Many people share their designs online or in books, and you can learn from how they put things together or even adapt their ideas.
What should I do if my pop-up card doesn’t open or close correctly?
If a pop-up part doesn’t work right, check your folds to make sure they are crisp and in the right place. Also, make sure nothing is glued where it shouldn’t be, like on a moving part. Sometimes, a small adjustment is all it takes!
 3D Facility Virtual Tour
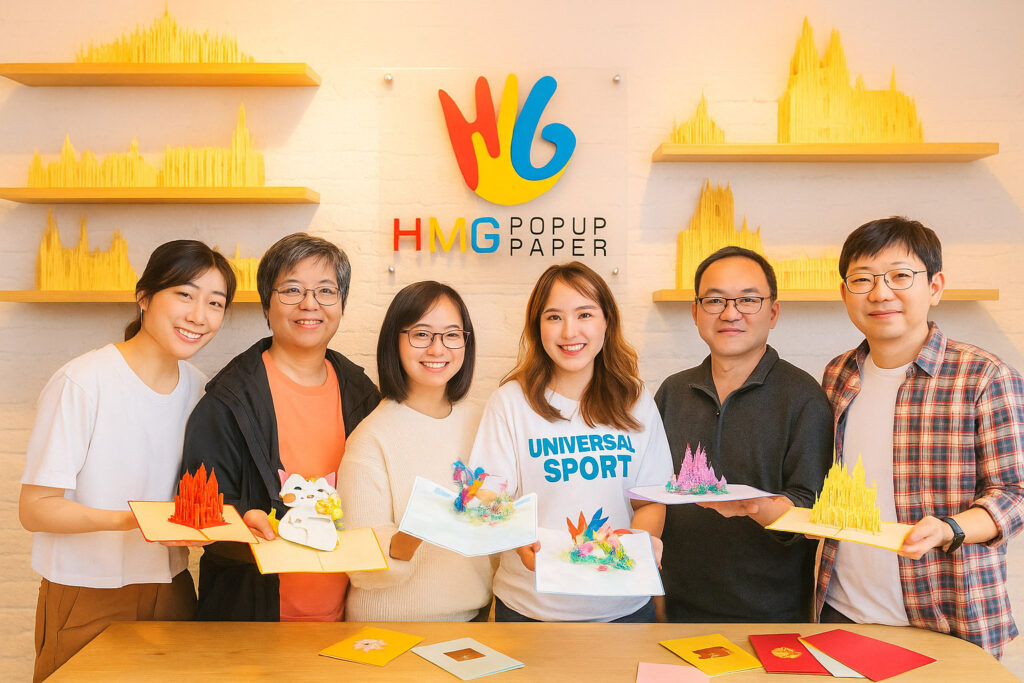
AUTHOR
Hana Phung
As the co-founder and Vice Director of HMG, Hanna Phung stands at the forefront of a decade-long journey dedicated to bringing joy through innovative pop-up card designs. With her visionary leadership, Hanna, alongside her accomplished team, has crafted ...Read More
BLOG
Maybe You Are Interested
3D Mother and Child Card – A Meaningful Gift for Mother
There are moments when you want to say something truly meaningful to your mom—but somehow,...
Read more...Unlock Savings: Your Guide to Finding the Best Business Cards Wholesale Deals in 2026
Thinking about getting new business cards? In 2026, just handing out a plain old rectangle...
Read more...Finding the Best Business Cards Supplier for Your Company
Picking the right business cards supplier can feel like a big deal. You want something...
Read more...Why Leading Brands are Choosing Bespoke 3D Popup Card this March 8th
Every year, as International Women’s Day approaches, my desk is filled with orders for 3D...
Read more...Creating Shareable Moments: How Pop-Up Products Drive Social Media Traffic
Social media has become one of the most powerful drivers of product discovery, brand awareness,...
Read more...Sourcing Resilience: Navigating Supply Chain Stability for Seasonal Gifts
Seasonal gifts present a unique set of sourcing challenges that differ significantly from year-round product...
Read more...